Online registration and ticketing for city tours can be very easy with Event Smart. Here is a great example of how you can create online registration for several different types of tours on one page (walking tours, bus tours, cycling tours, eating/beverage/food tours, etc.). Of course, you could create separate events for each type of tour, but for demonstration purposes, we added multiple types of city tours to this one example.
Online registration for city tours
This is the event page we’re building (based on your theme selection).

City Tour Online Registration & Ticketing
Setup online registration for city tours
Event Title

Event Title
Describe your event with a descriptive title, keywords or brand name. In this case I just used “NYC Tours” to describe the location and type of event. The name of the event is important because it is used as the default title of the page for search engines. You can alter the “machine friendly” name of your events via the Search Engine Optimization meta box further down the page (not shown).
Event Description

Event description
The description of your event is your chance to highlight the great things about your tours.
Event Venue
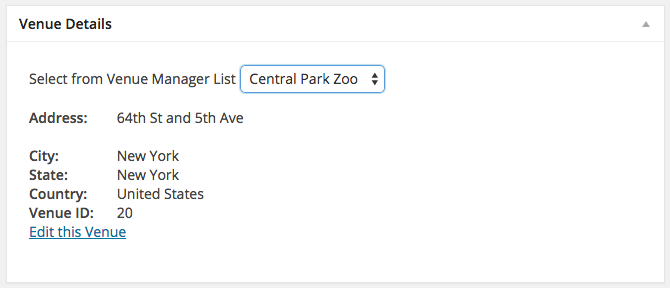
Select Venue
You can add venue details for this one event, choose a venue from a venue you’ve previously created (Advanced Venue Management upgrade).
Event Datetimes (single or multiple occurrences of an event)
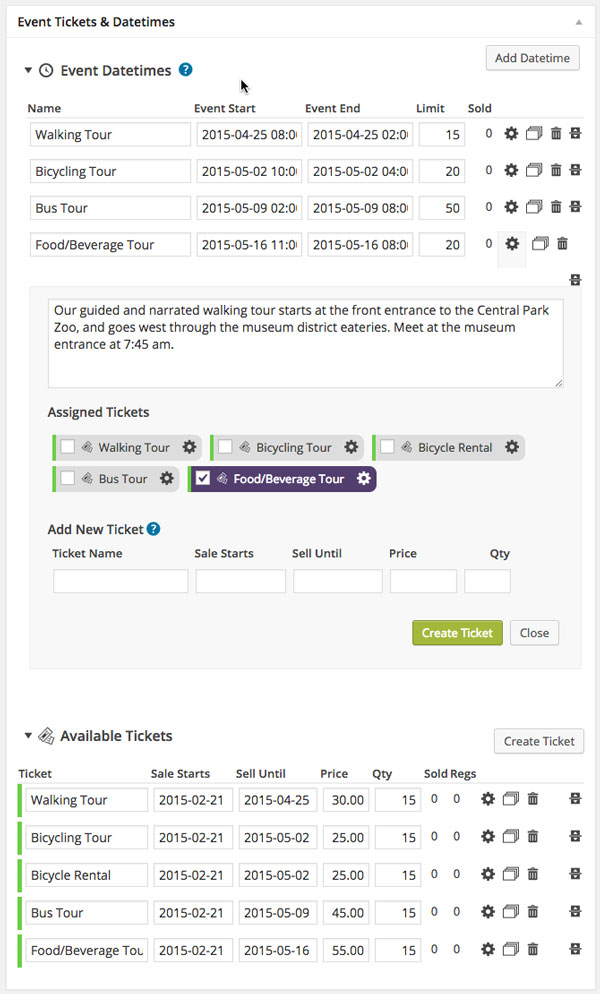
Event Datetimes
In this example, we’re using the datetimes to represent the different tour options. Each type of tour is a different datetime, e.g. Walking Tour datetime, Food/Beverage Tour datetime, etc. You can have just one datetime with one type of tour if desired. Having multiple datetimes per event is an available upgrade with the Advanced Event Editor.
You can add a datetime name, start and end dates, capacity limit, description, and assign which tickets have access to that datetime (giving you a custom list for that datetime/event). You must associate at least one ticket for each datetime. Datetimes can offer many ticket options, or a ticket option can grant access to multiple datetimes.
You can also re-arrange the order of the datetimes by dragging and dropping them into place (above or below each other.
Tickets
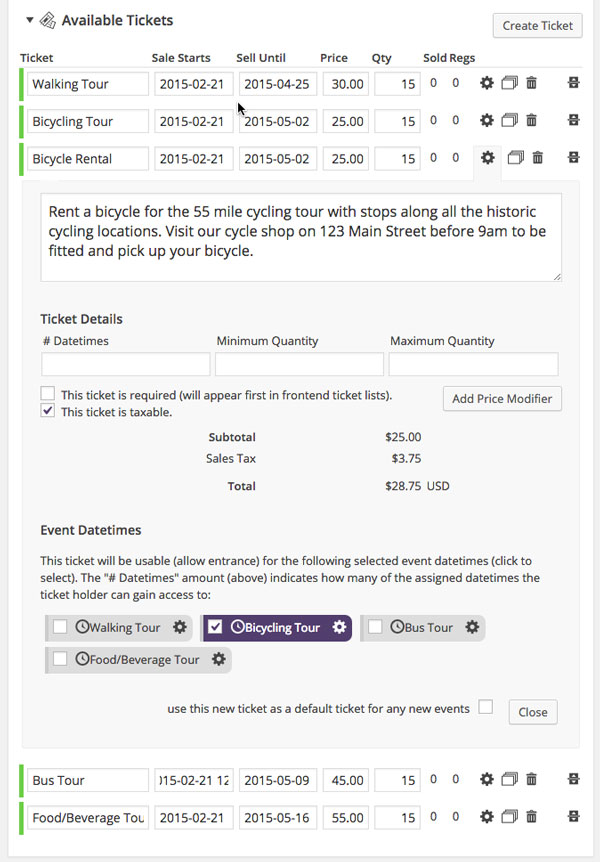
City tour ticket options
In this example there is one ticket option for each datetime or tour. You must associate at least one ticket for each datetime. Datetimes can offer many ticket options, or a ticket option can grant access to multiple datetimes. Notice that there is even a ticket option for renting a bicycle, which is associated with the Bicycling Tour datetime. This helps us control how many people we have on the tour and how many bikes are rented.
Primary & Additional Attendees
You can decide to collect the personal information (or more information) from the Primary Attendee (first person registering) and Additional Registrants via the meta boxes for these groups individually. Select the question groups (Advanced Registration Forms upgrade) associated with the questions you would like to ask each group respectively.
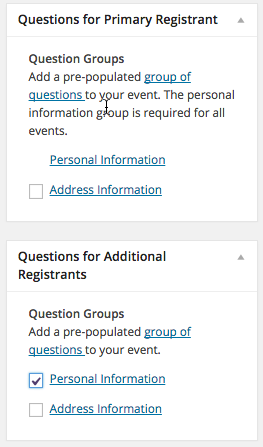
Online registration question groups
Optional Settings
Depending on how you want to manage your event, you can also control individual settings, including:
- Commenting
- Slug
- Author
- Excerpt
- Search Engine Optimization
- Notifications
- Maximum number of tickets allowed per order for this event
- Display Ticket Selector (I would recommend leaving the ticket selector ON, so people can buy the tickets)
- Event Phone Number
- Default Registration Status
- Tags
- Categories
- Featured Image
Email & Tickets
When your audience registers, they will receive a confirmation of their registration based on their payment status. If their payment is not successful, they will be sent an email to make a payment. As soon as your audience makes a payment, they will be sent a default registration confirmation.
With the Advanced and Customized Messages upgrades, you can change the messages that your attendees receive.
With the Printable Tickets and/or Ticket Scanning upgrade options, you can deliver a printable or electronic tickets for your audience to bring with them to check-in at the event.
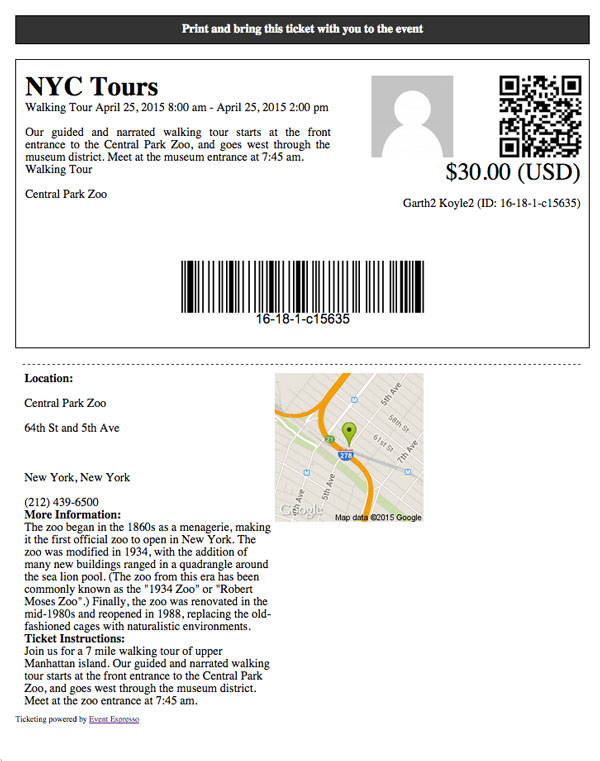
Simple Ticket
Calendar View
When you begin to schedule multiple events, the Events Calendar upgrade becomes very helpful for attendees to find events based on a certain date.
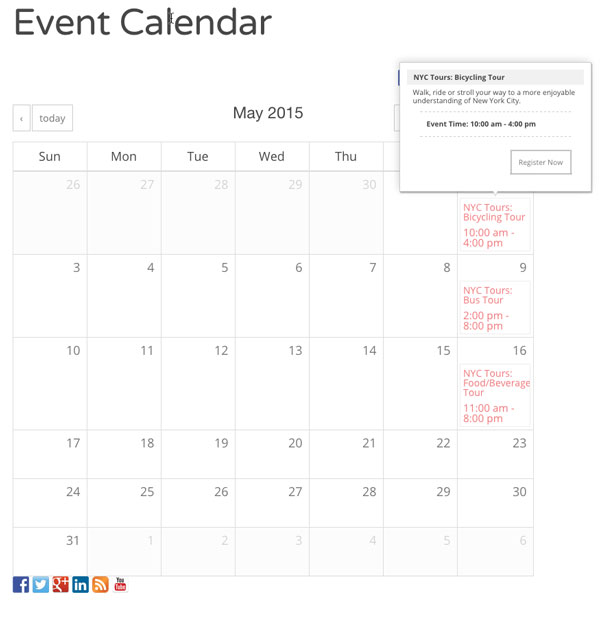
Online registration ticketing calendar
Notice that each datetime appears on the calendar so that your attendees can discover when your city tours are scheduled. Your audience can also click on each datetime and be directed to your event details page to get further information and register.
Questions?
If we have not answered your question about whether you can use Event Smart for your city tour online event registration, contact us and let us know. We’ll do our best to answer any questions you have.